At MMSMOA 2018 in my Hacking the Task Sequence 2018 that I presented with my good friend Andreas Hammarskjöld, one of the demonstrations that I did was to show how to unload a disk filter driver in WinPE without doing a reboot. The number one reason for wanting to do this is to provide a zero touch method for converting systems that are running 3rd party disk encryption from BIOS to UEFI. None of the 3rd party disk encryption vendors that I know of support MBR2GPT, which makes it extremely difficult (not to mention costly) to get these systems that are currently running BIOS over to UEFI. If you attempt to do the destructive process (wipe and load) using the method that was first supported in Configuration Manager 1610, it fails after attempting to boot up after the conversion steps. The reason for this is that diskpart is running under the filter driver. It appears to do a diskpart clean, partition, format, but since it is doing this under the filter driver it is only cleaning the contents within the encrypted container (this is when the boot image is booting from the hard drive – this does not apply to PXE or USB booted systems, but then again that is not zero touch).
The following method can be used in order to switch the systems from BIOS to UEFI during a wipe and load operating system deployment and the 3rd party disk encryption can then be re-installed after the new OS is installed. Alternatively, this opens the opportunity to make the switch to BitLocker and ensure that your future upgrades are not delayed because you are waiting on the 3rd party disk encryption company to get their product working on the latest version of Windows 10 (further putting you behind the eight ball and delaying your upgrade). Another thing is that it enables you up to get away from those ‘legacy’ preboot authentication methods that use cached AD credentials (yuck) and get with the times using a trusted boot process combined with things like Secure Boot, Credential Guard and Device Guard. If your disk encryption team insists on using 3rd party disk encryption, ask them how many of the recent breaches were a result of someone cracking disk encryption – zero, most of them happened from bad credential hygiene. In other words, disk encryption is just one attack vector and it if is preventing you from getting to UEFI and Secure Boot, then you are not going to be able to take advantage of the modern virtualization based security available in Windows 10. Which brings me to my favorite line of my Hacking the Task Sequence 2018 session – “Because 3rd party disk encryption sucks and prevents zero touch BIOS to UEFI which makes you less secure, not more secure”.
*Disclaimer: the following process may or may not work with your 3rd party disk encryption software. I have had success with both McAfee and Check Point. This does not work with WinMagic, however I am told they will provide an method for cleaning the disk. If you are successful with other 3rd party disk encryption software using this method, leave a comment below so that I can update the post.
The first thing you will need is Devcon. This is part of the WDK, Visual Studio and the Windows SDK for desktop apps (see the Devcon link for more information and download links). You can include this in your boot image (see my post ConfigMgr 2012: Always including certain files in your Boot Images) or use a reference package and copy it to WinPE in x:\windows\system32 before you start (cause we are deleting the contents of the disk and you will not be able to run from a package once this happens).
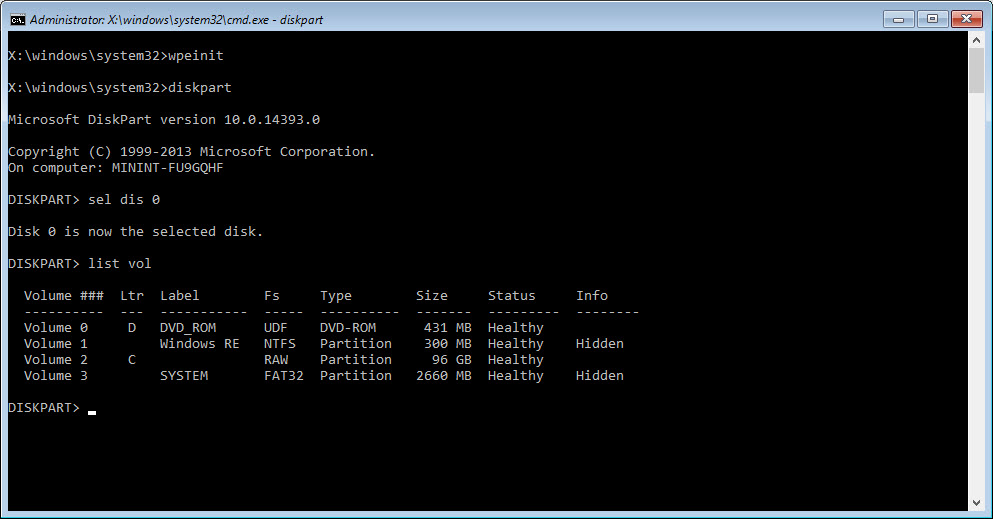
Booting the system from media shows that the disk is encrypted and unreadable (note volume 2 shows as RAW):
Now boot the system like we would during OSD from the hard drive with a Boot Image that contains the necessary disk filter drivers. Running the same command we see that the disk is unlocked and readable:

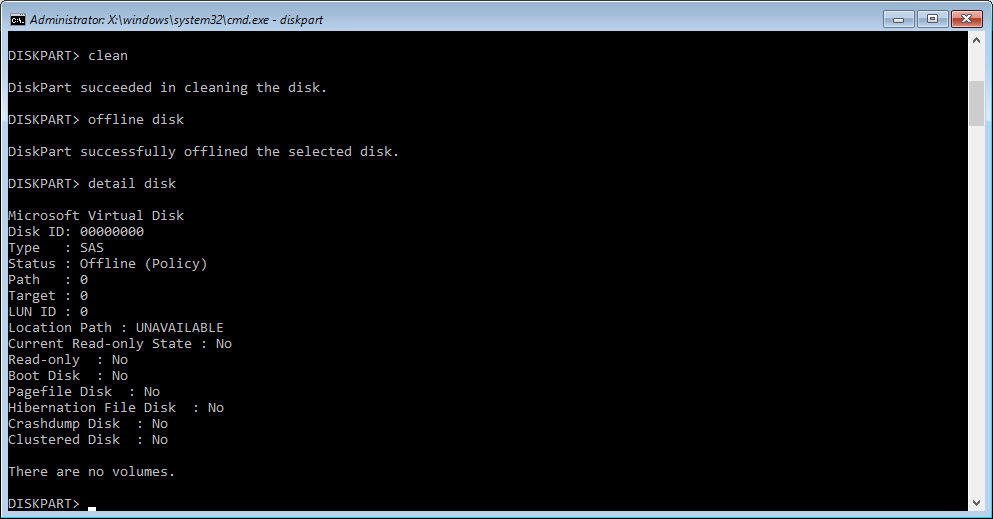
The first thing I like to do is to clean the disk to free up and processes that may be using it and then take the disk offline. This is done using the following diskpart commands:
clean
offline disk
detail disk (shows that the disk is offline)
exit
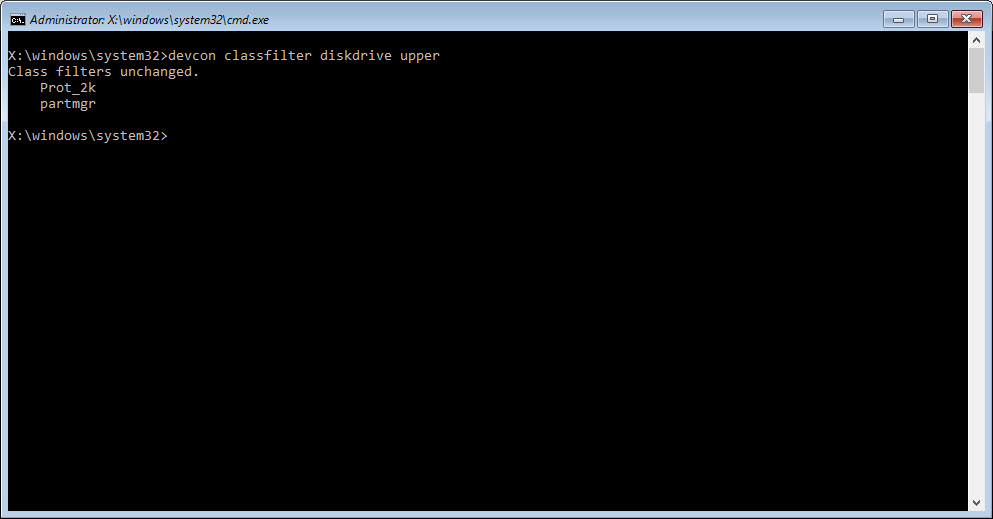
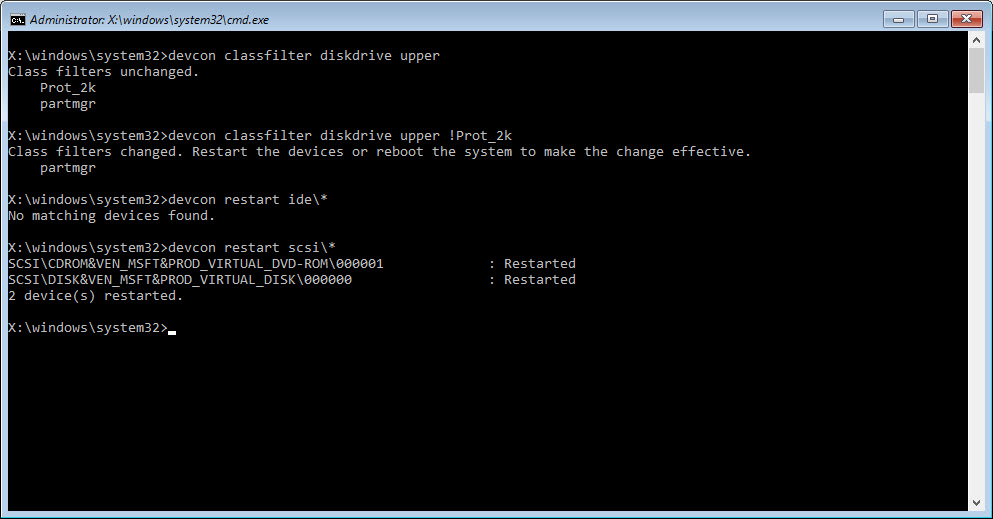
Running the following devcon command to show the loaded disk filter drivers and we can see that Prot_2k is loaded:
devcon classfilter diskdrive upper
Now we are going to use the following commands to unload the filter driver. In order to prevent the reboot, we are going to simply restart the ide and scsi bus (the disk will likely be on one or the other and therefore it does not hurt restarting both). This is done using the following commands:
devcon classfilter diskdrive upper !Prot_2k (for Check Point, use MfeEpePC for McAfee)
devcon restart ide\*
devcon restart scsi\*
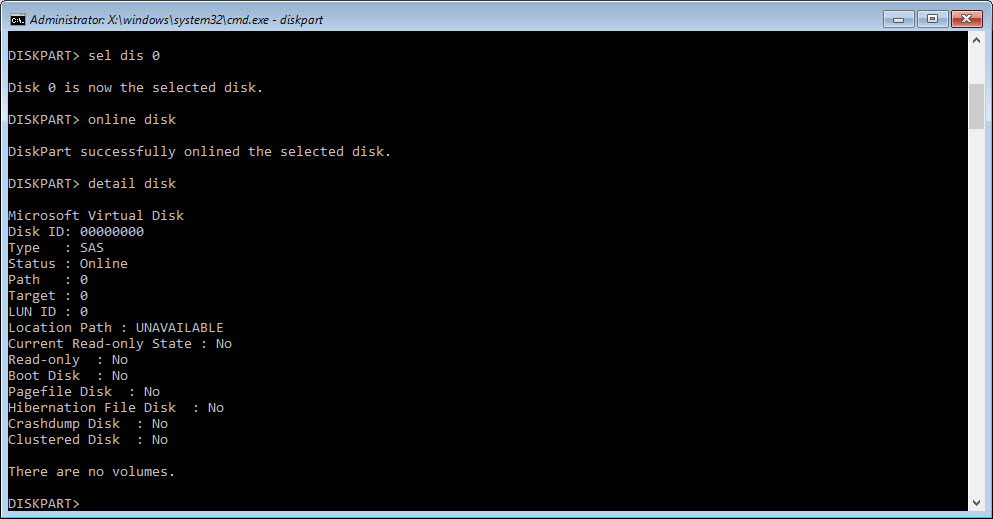
Go back in to diskpart to bring the disk back online and clean the encryption from the disk using the following commands:
diskpart
sel dis 0
online disk
detail disk
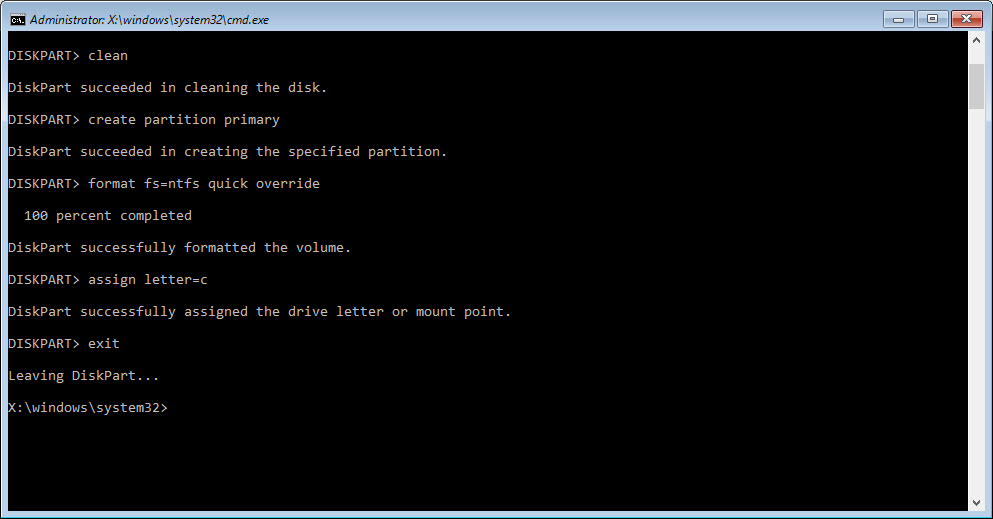
clean

At this point, if running in a Task Sequence, the next step could be the built in Format and Partition Disk step. However, for the sake of this example, I am going to go ahead and create a partition and format it to show that the disk encryption is now gone and the disk is readable if booting from other media.
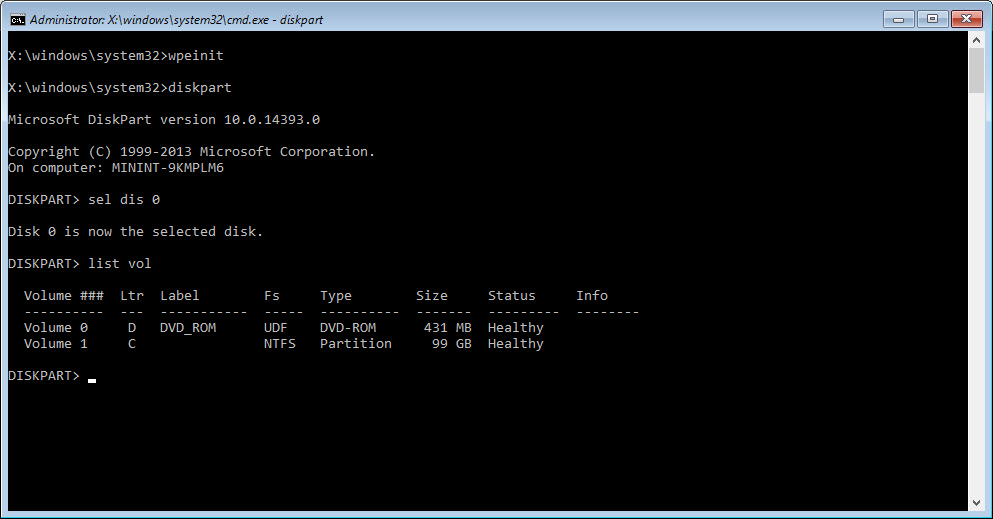
Rebooting from media and now we can see that the encryption is gone and the disk is no longer encrypted.
Whether your company chooses to stay on 3rd party disk encryption or move to BitLocker as part of the process, hopefully this provides you with information on how to make a successful zero touch transition from BIOS to UEFI so that you can take advantage of the advanced security features in Windows 10.
As for BitLocker, it no longer needs to be suspended during a Feature Update (i.e. moving from one version of Windows 10 to another) starting with Windows 10 1803. As for 3rd party disk encryption, there are ways to get around the encryption during a Feature Update ;).
Originally posted on https://miketerrill.net/

Mike – may I ask which version of McAfee Disk Encryption you tested with? I am seeing issues with getting their driver to work with WinPE on “v7.2.x” for Wipe-and-Load scenarios. Thanks.
I think it was on 7.0 or 7.1. I haven’t used it on 7.2.
Pingback: Zero Touch – McAfee to Bitlocker (Wipe and Load) – Michael Handley's IT Blog
Followed all steps but Apply OS step is failing because disk is not bootable. smstslogs show error “Marking partitions active is only supported on MBR disks. Im using tsenv2 tool to set the _SMSTSBootUEFI read only variable to true. Is there something else im missing?
There shouldn’t be any reason to change the read-only variable. Here is how I do it:
1. Flip BIOS settings
2. Remove filter driver
3. Partition the disk for UEFI (with TSUEFIDrive variable)
I am working moving Windows 7 systems which have McAfee encrypted drives to Windows 10. I have implemented the process using https://michaelphandley.wordpress.com/2018/07/14/zero-touch-mcafee-to-bitlocker-wipe-and-load/ and the information provided on your page and I have a issue that maybe you could possible answer. All steps in Michaels and your page are within our SCCM TS and boot image and all steps except when we get to the step to run devcon restart ide\* which occurs while in WinPE. When we run this step we get a BSOD of death, any idea’s of why this may occur. All previous steps that you have outlined that are required to be performed prior to devcon restart ide\* step are in place. Thanks.
I have not seen that but I would check the WinPE version of your boot image. If running a newer version, then maybe something has changed in WinPE that is causing this…just a thought.
Do you recall what version of WinPE that you were running? We are running. We are running ADK version 1809.
It would have been 1803 or 1709 possibly. I haven’t tried it with 1809 yet.
Yes maybe something did change with 1809. I appreciate your response. Hopefully a solution will surface at some point. Thanks
Good luck and post back if you figure it out.
I am seeing the same thing with a Win 7 Hyper-V VM I was doing some testing with that has an IDE controller. So far none of the actual physical machines I have encountered that will be switched from McAfee to BitLocker have IDE disks or controllers present as indicated when running the devcon restart ide\*. David, what model(s) are you seeing this on?
Has anyone had success with this against the nasty ass Sophos SafeGuard???