 When starting any operating system deployment project, it is a good idea to know what systems are in your environment so that you can determine which of these systems need to support the new OS. Some systems may need to be replaced, where as others might only need a BIOS UEFI update. It is also a good idea to standardize on the BIOS UEFI settings for each supported model in the environment. This ensures that consistent settings are used so that certain systems management features function correctly (for example, like wake-on-lan).
Now that Windows 10 is here, now is the time to standardize on native UEFI as the default boot mode. When making this switch, it is also important to enable Secure Boot at the same time. But, before you can do that, you need to determine not only what is in your environment, but how each system is configured.
You can inventory these hardware specific settings with System Center Configuration Manager. In How to Inventory Dell BIOS and UEFI Settings with ConfigMgr Part 1 I went through the steps for deploying the Dell Command | Monitor application to your Dell workstation clients. This is required in order to get the Dell specific information into WMI so that we can inventory it with ConfigMgr. Now we need to add the Dell classes to the Default Client Settings Hardware Inventory.
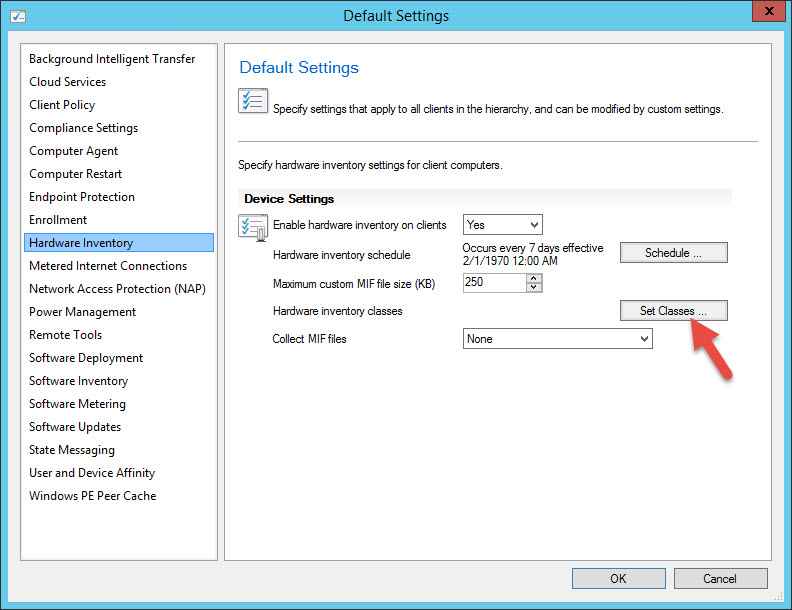
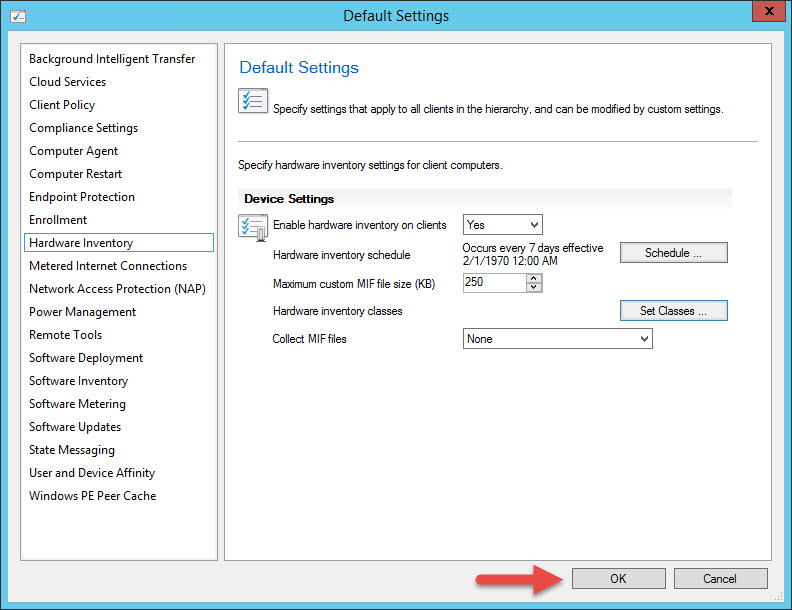
- Open the Default Client Settings, select Hardware Inventory and click the Set Classes button.

- On the Hardware Inventory Classes window, click the Import button.

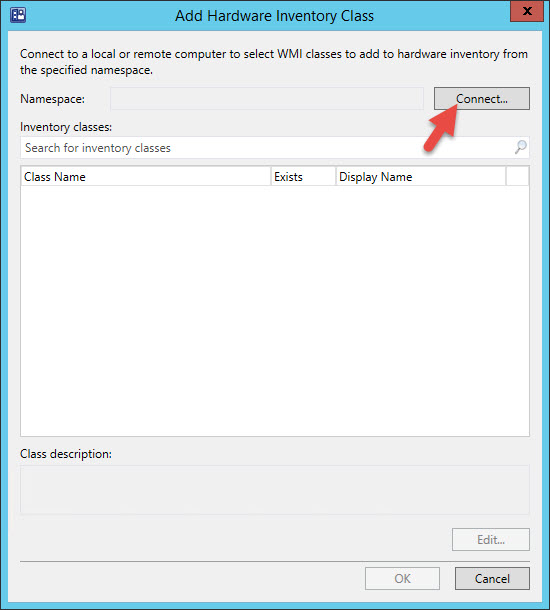
- On the Add Hardware Inventory Class window, click the Connect button.

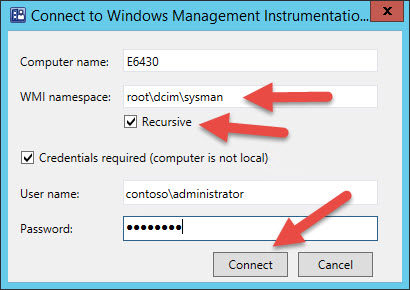
- If the system that is running the ConfigMgr Console is a Dell with the Dell Command | Monitor installed, leave the pre-populated computer name. Otherwise type the computer name of a Dell system that has Dell Command | Monitor installed and is currently on the network. For the WMI namespace field, enter: root\dcim\sysman and check the Recursive box. Enter credentials if connecting to a remote system and click the Connect button.

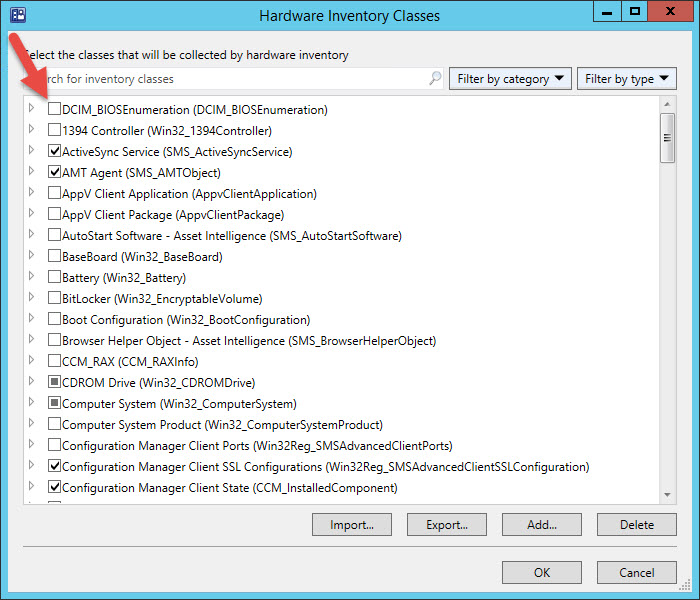
- On the Add Hardware Inventory Class window, select the following class: DCIM_BIOSEnumeration and click OK. This enables us to inventory BIOS UEFI settings (current and possible).

- Back on the Hardware Inventory Classes window, I recommend un-selecting the class for the Default Client Settings (in fact, I recommend trimming the Default Client Hardware Inventory Classes down to just a few and target only the necessary classes via Custom Client Settings). We will add them to a Custom Client Settings designed for Workstations. Unselect DCIM_BIOSEnumeration and click OK.

- On the Default Settings windows, click OK.

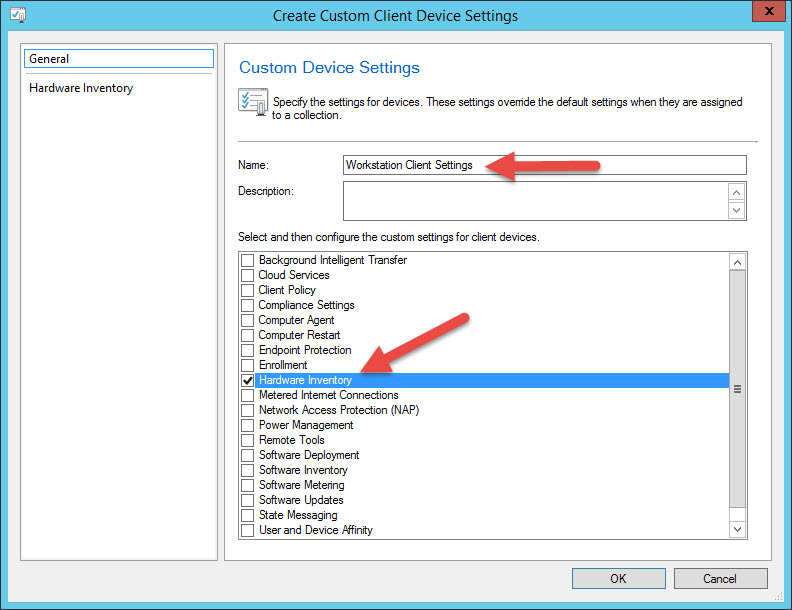
- Next, create a Custom Client Device Settings, give it the name Workstation Client Settings, select Hardware Inventory (or use a previously created one).

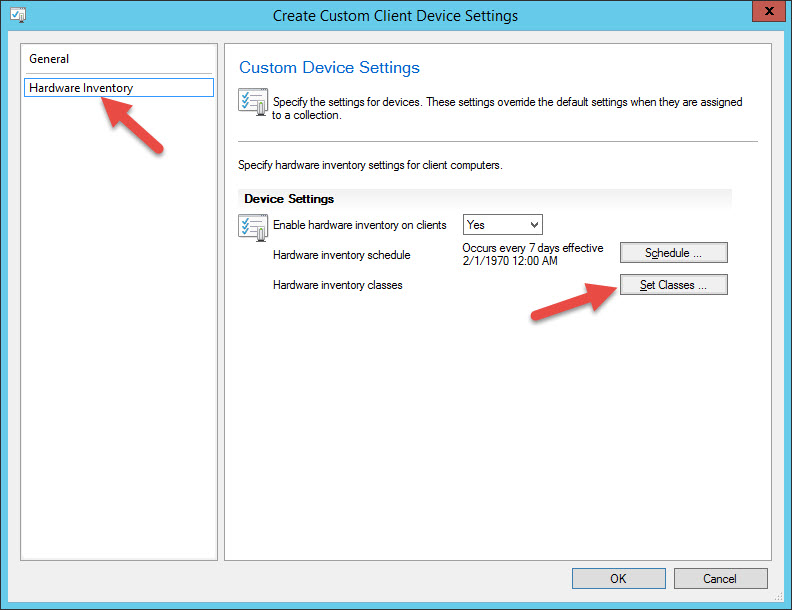
- Click on Hardware Inventory in the left pane and click Set Classes.

- Select DCIM_BIOSEnumeration and the following fields should be selected: AttributeName, CurrentValue, DefaultValue, IsReadOnly, PossibleValues, PossibleValuesDescription (InstanceName gets selected by default) and click OK. These are the fields that have useful information that we can use for reporting.

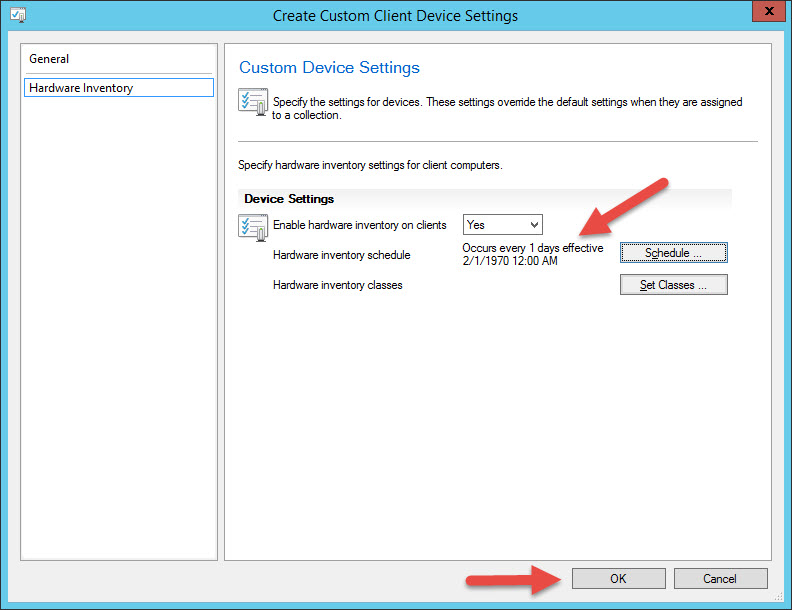
- On the Create Custom Client Device Settings window, adjust the desired Hardware Inventory schedule and click OK.

- Deploy the newly created Workstations Client Settings out to a collection that contains Dell workstation systems. I have one called All Workstation Clients.

- On a targeted Dell system, kick off a Machine Policy Retrieval & Evaluation Cycle and then a Hardware Inventory Cycle. In the InventoryAgent.log on the client, you should find an entry being inventoried for the newly defined namespace.

- Back in the ConfigMgr Console, use the Resource Explorer and open up the Hardware Inventory for the system that was used in the previous step. Here you will see that the new class and corresponding values have been added.


Hopefully you found this post useful and it helps you to gather and report on Dell specific settings using System Center Configuration Manager.
Originally posted on https://miketerrill.net/

Pingback: How to Deploy Dell Command | PowerShell Provider with ConfigMgr | Mike's Tech Blog
Could you do a third post please that shows how to actually create reports off the data? Many SCCM admins are not SQL or Report gurus
What kind of reports do you have in mind? Anything in particular, like TPM versions/settings? I have a bunch of other blogs in draft right now, but this gives me something to think about when I finish those posts.
Hi Mike, I keep getting invalid namespace. I have made sure I put in the WMI namespace correctly. It worked for HP and Lenovo in your other blogs. Just can’t connect to root\dcim\sysman and I tried several Dell systems.
Hi Steve,
Is the Dell machine running the latest version of Dell Command | Monitor? This agent is what creates the WMI namespace.
-Mike
Pingback: Configuring WoL with CM for Dell Desktops – Part 3 | Mike's Tech Blog