
If you have worked with Microsoft Endpoint Manager Configuration Manager (MEMCM, CM for short and previously known as SCCM) for more than a day, you are probably aware of its immense power that it can yield on any and all of the clients it manages. It has an extremely mature Role Based Administration model that allows for very granular control to give only a certain level of access to only those that need it. This can minimize disasters such as deploying an unintended task sequence to the All Systems collection.
In larger organizations (and those that take risk seriously), this is hopefully a utilized feature. However, in smaller organizations or those where there are only a few CM admins, this might not be the case and those admins might have Full Administrator rights. Regardless of the model, CM Full Administrator accounts should be protected with the maximum security possible. This means that a separate elevated account should be used for this function and not a day-to-day user account that is also used for email, web browsing, etc. If you are using a day-to-day user account and it has CM Full Administrator access, stop reading now and implement a separate elevated account!
In today’s threat landscape, just a separate elevated account is not good enough. These elevated accounts should also be protected using multi-factor authentication (MFA). The good news is that CM natively supports two different types of MFA – certificate authentication and Windows Hello for Business (which is not to be confused with Windows Hello).
In this post, I am going to focus on using certificate authentication using smart cards. If you are thinking “great, I might as well stop reading now since I don’t have any access to smart cards”, don’t worry as I am going to focus on using virtual smart cards. This is something that anyone with a PKI and TPM will be able to easily configure and implement.
Part 1: Creating the Virtual Smart Card Certificates
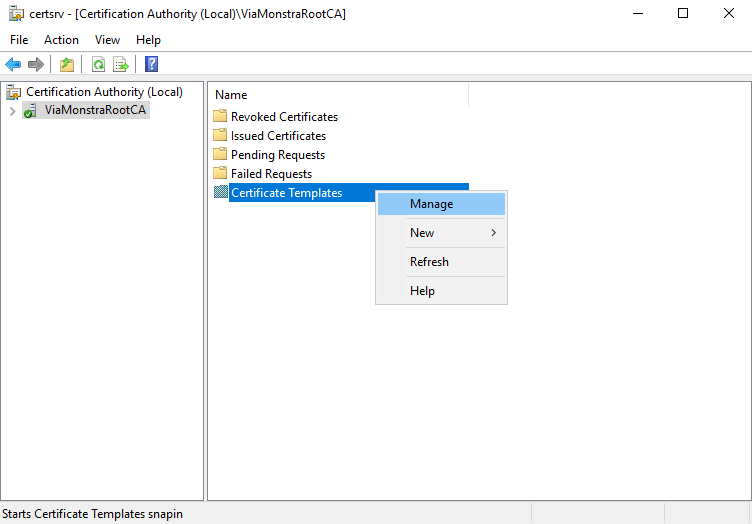
The first thing we need to do is create a certificate template that can be used with smart cards. Open up the Certificate Authority and then right-click on Certificate Templates and select Manage.
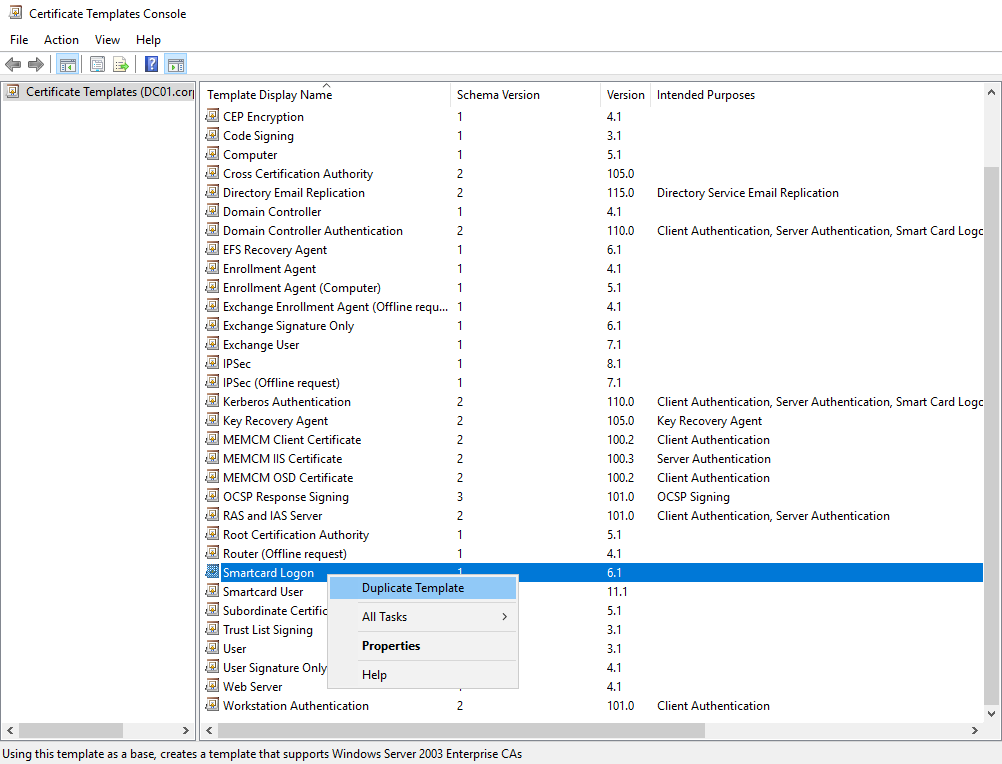
In the Certificate Templates Console, find and right-click on the template called Smartcard Logon and select Duplicate Template.
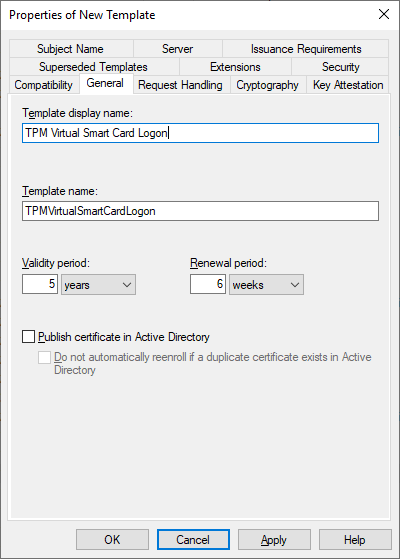
On the Properties of New Template General tab, give it a display name of TPM Virtual Smart Card Logon and select the desired Validity period and Renewal period.
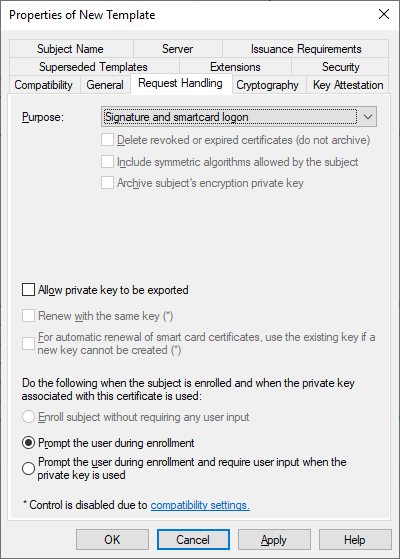
On the Request Handling tab, ensure the purpose is set to Signature and smartcard logon and under Do the following when the subject is enrolled and when the private key associated with this certificate is used: is set to Prompt the user during enrollment.
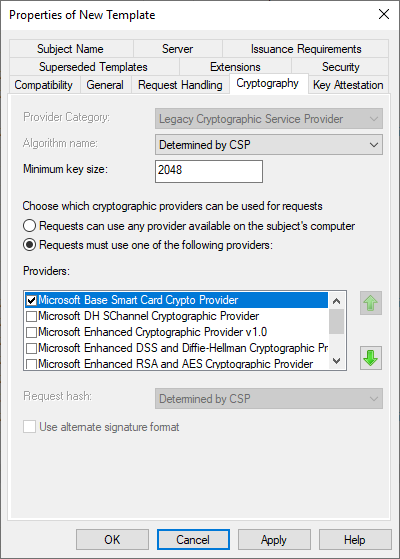
On the Cryptography tab, select Requests must use one of the following providers: and select the Microsoft Base Smart Card Crypto Provider.
On the Security tab, add a group that you would like to control who has access to request Smart Card certificates. For this example, I am just going to use Authenticated Users. Grant the group both Read and Enroll permissions.

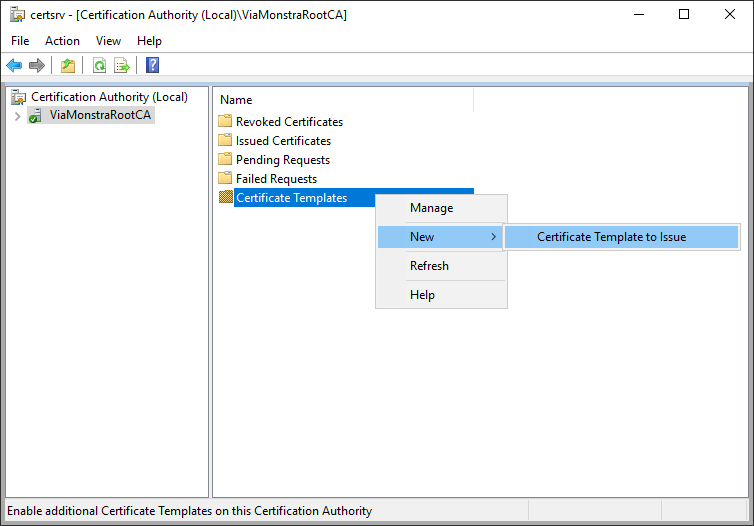
Back in the Certificate Authority console, right-click on Certificate Templates again and select New > Certificate Template to Issue.
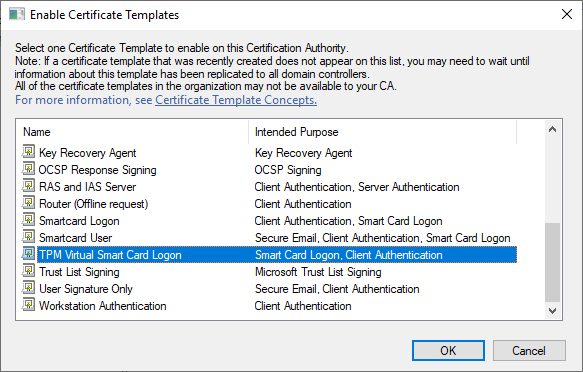
In the Enable Certificate Templates window, select the newly created TPM Virtual Smart Card Logon template and click OK.
Part 2: Installing the Virtual Smart Card and requesting the Virtual Smart Card Certificate
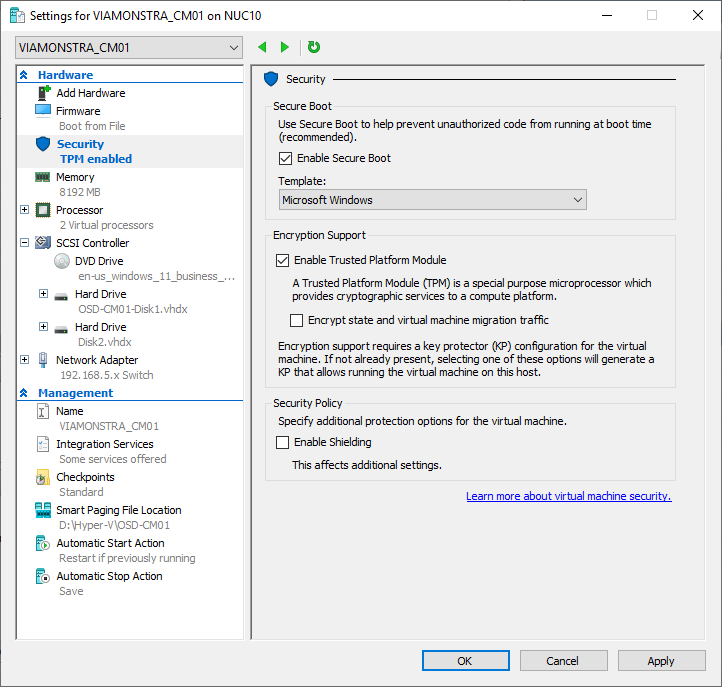
If you are connecting from a VM, ensure that it has TPM enabled. This can be done under the Security node in the Hyper-V settings.
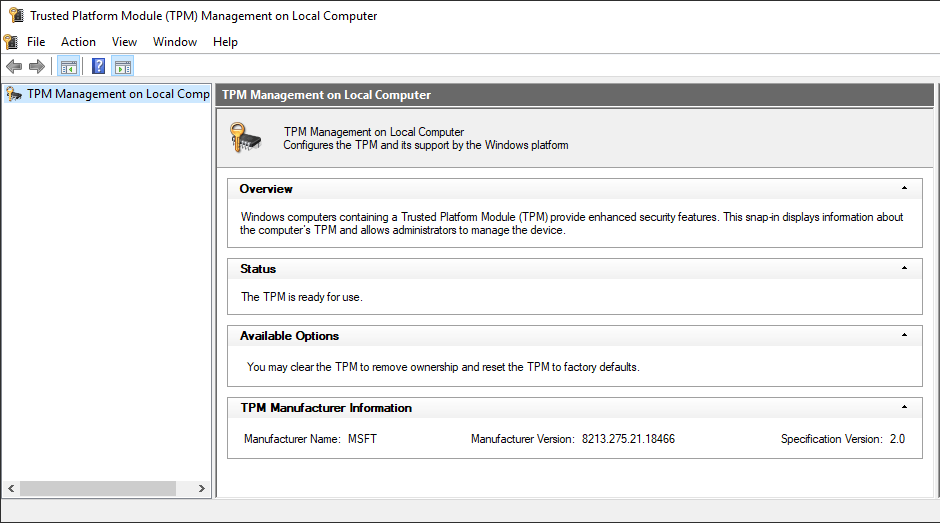
In the running Operating System, make sure the TPM is ready for use. This can be done by running the TPM Management console (tpm.msc).
Open an elevated command prompt and run the following command and select the desired PIN:
tpmvscmgr.exe create /name VirtualSC /pin prompt /adminkey random /generate
NOTE: this command needs to be run from a console session and cannot be run from an RDP session (or a Hyper-V Enhanced session).

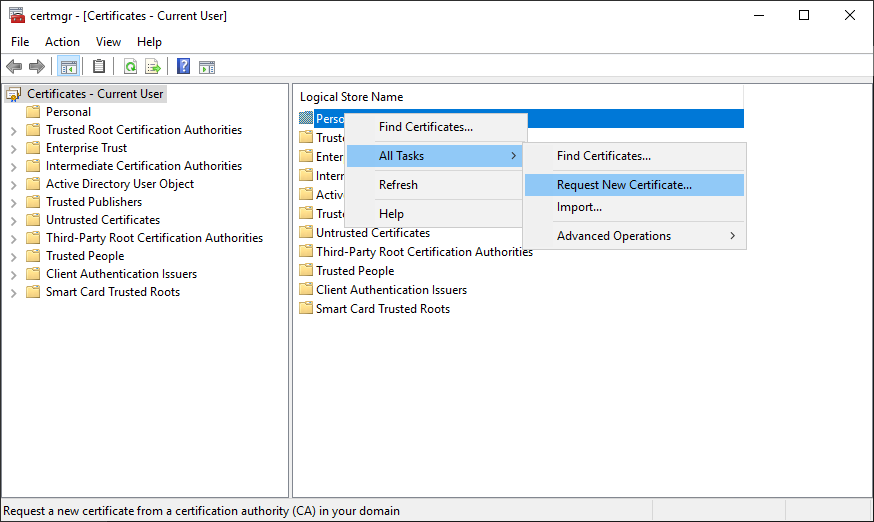
Running under the account that the Smart Card certificate needs to be assigned, open up the Certificate Manager for the current user (certmgr.msc). Right on the Personal folder and select All Tasks > Request New Certificate.
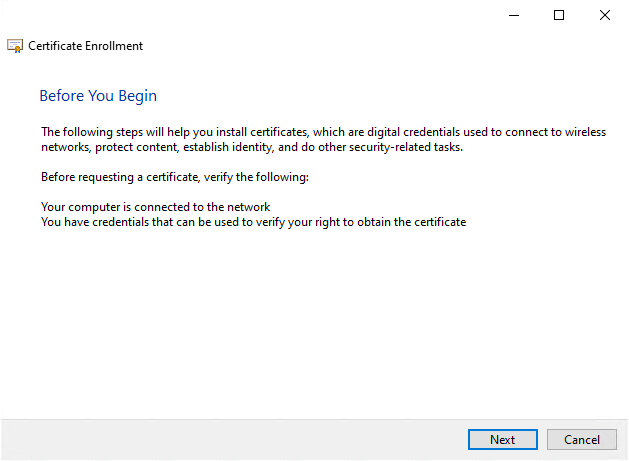
In the Certificate Enrollment wizard, on the Before you Begin step, click Next.
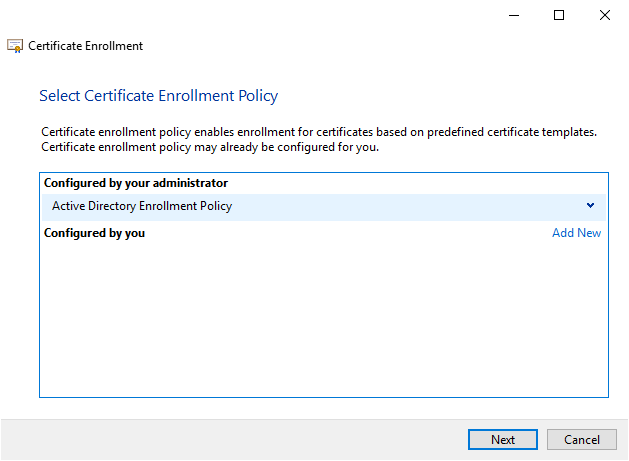
On the Select Certificate Enrollment Policy step, select Active Directory Enrollment Policy and then click Next.
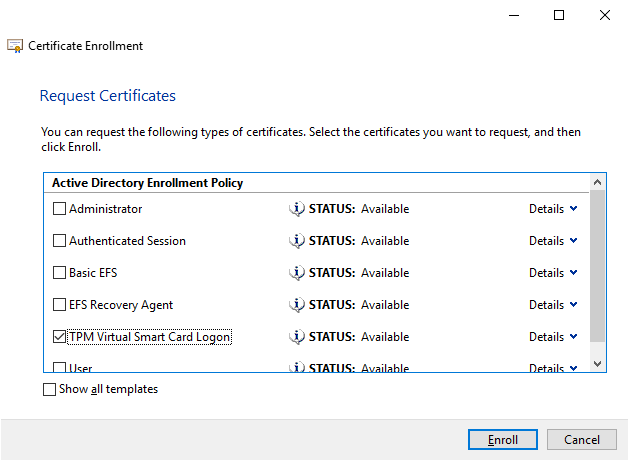
On the Request Certificates step, select the TPM Virtual Smart Card Logon certificate and then click Enroll.
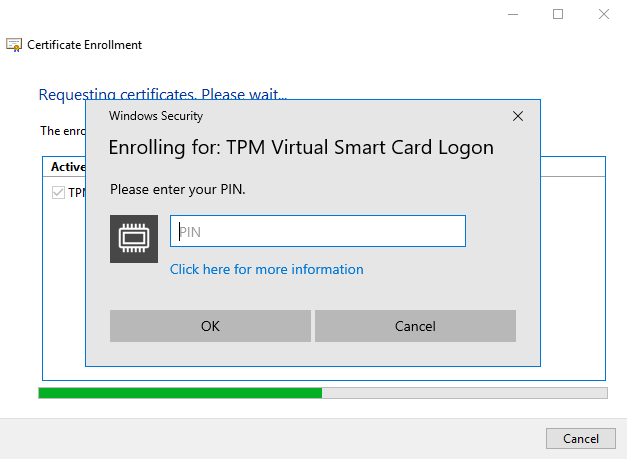
On the Windows Security prompt – Enrolling for: TPM Virtual Smart Card Logon, enter the PIN that was created earlier with the Virtual Smart.
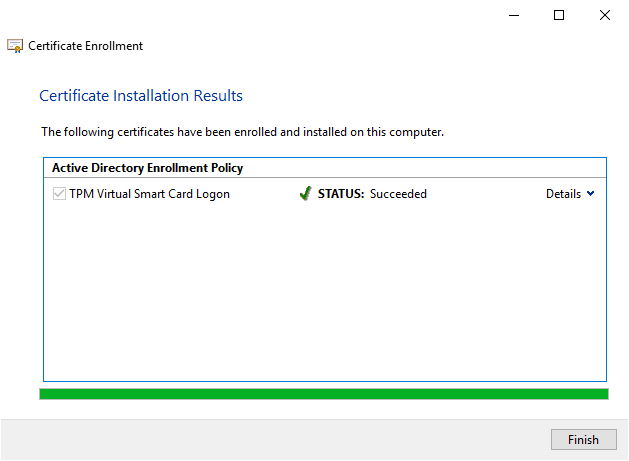
If the certificate enrollment was successful, the Certificate Installation Results will look like the following.
Part 3: Configuring the account to require the Smart Card
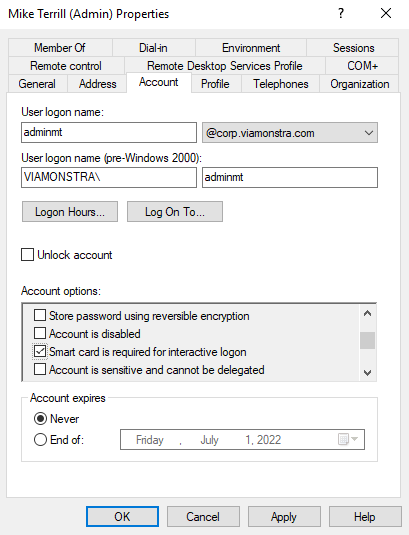
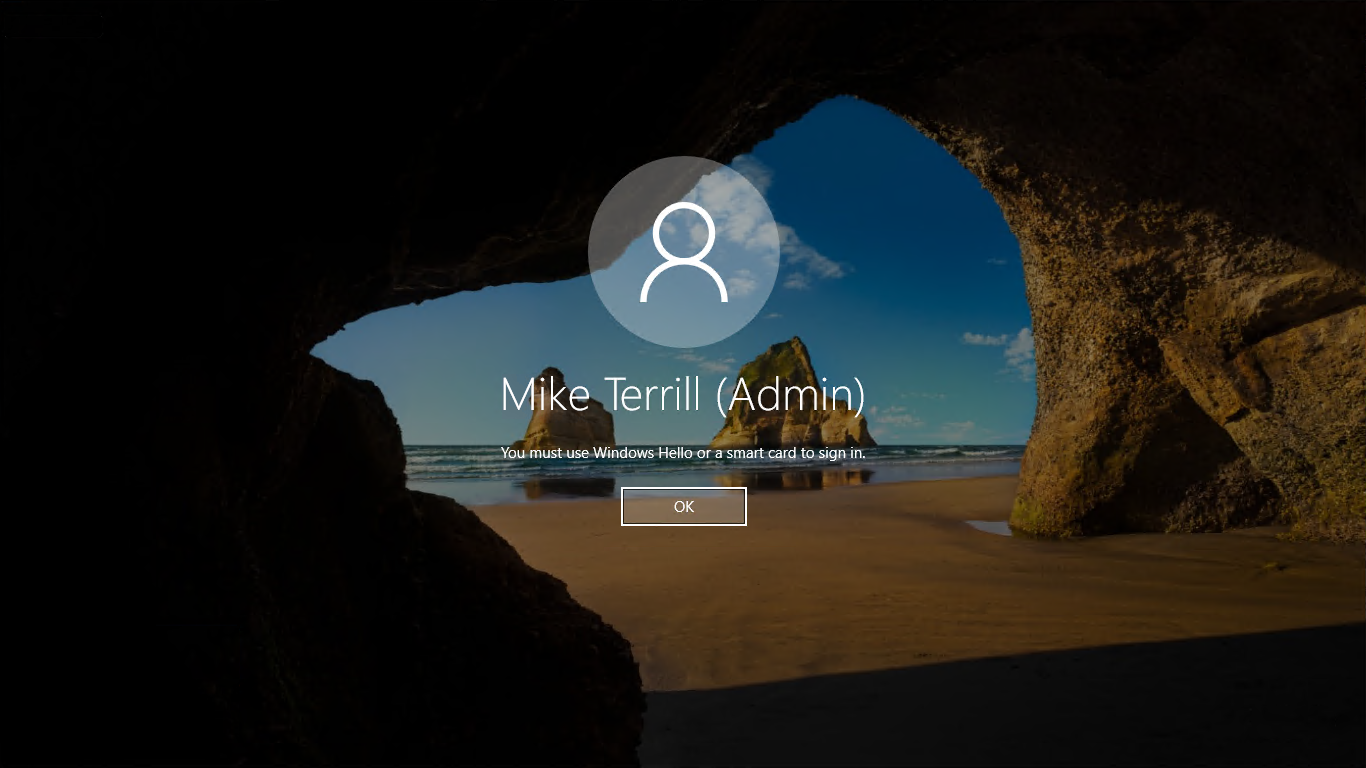
In Active Directory Users and Computers, locate the user account. On the Account tab, under Account options: select Smart card is required for interactive logon. This will force the multi factor authentication for logging onto windows and include the MFA claim in the user’s authentication token.
If the user attempts to log on to Windows using only the password only, the following message is displayed – “You must use Windows Hello or a smart card to sign in.”.
Part 4: Configuring CM to use Certificate Authentication
First configure a designated group or an account that is already a Full Administrator in CM as a MEMCM Break Glass Admin and then disable the account(s). This will be used in case of an emergency (like if a certificate has expired or a machine that had the Virtual Smart Card installed is no longer accessible).
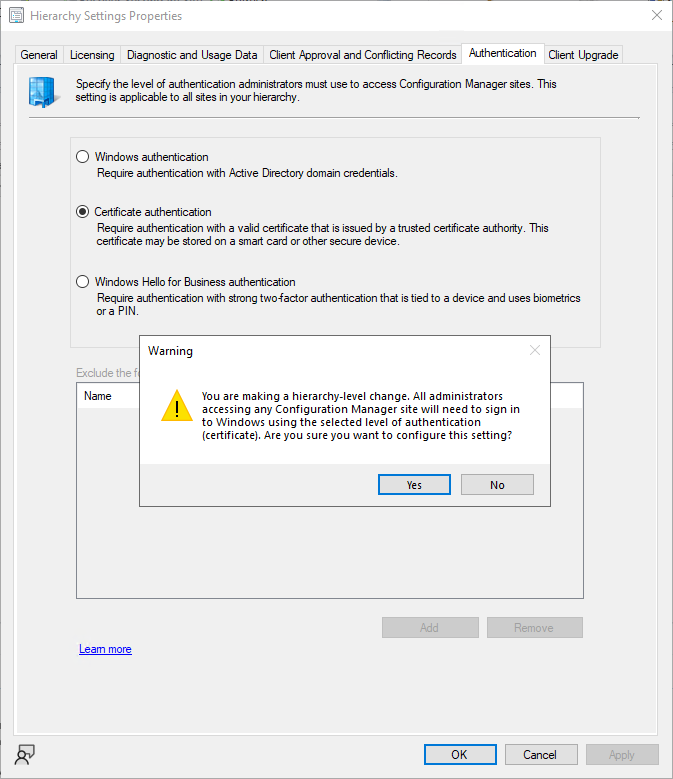
After this is done, sign on with the account that was used to request the Virtual Smart Card certificate, using the Smart Card to log into Windows. In the CM Console, open the Hierarchy Settings Properties. On the Authentication tab, select Certificate authentication. Read the warning impact – yes, all administrators that need to access CM will now need to have a Virtual Smart Card (unless you create an exclude group for them – but the idea is to make CM more secure, right?).
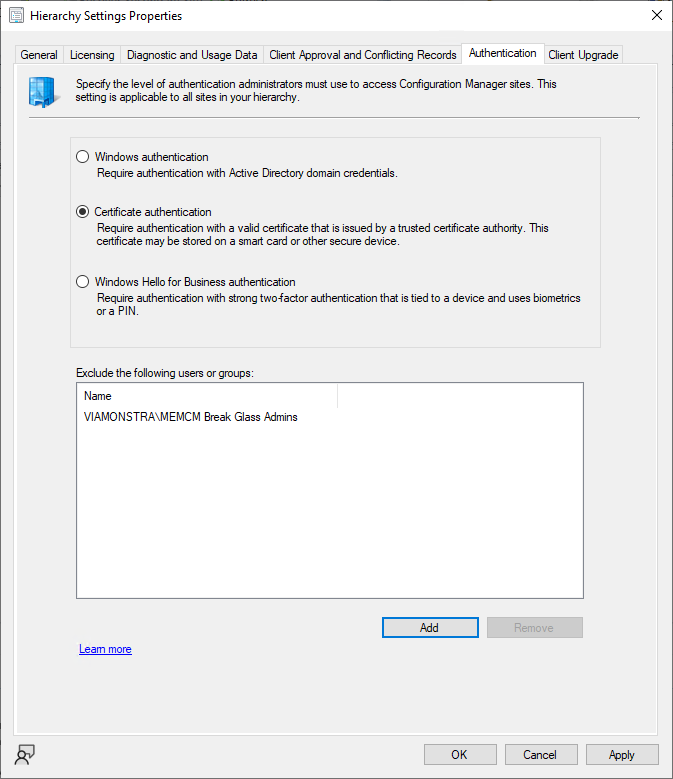
Under the Exclude the following users or groups section, add the Break Glass account(s) or group that was configured above.
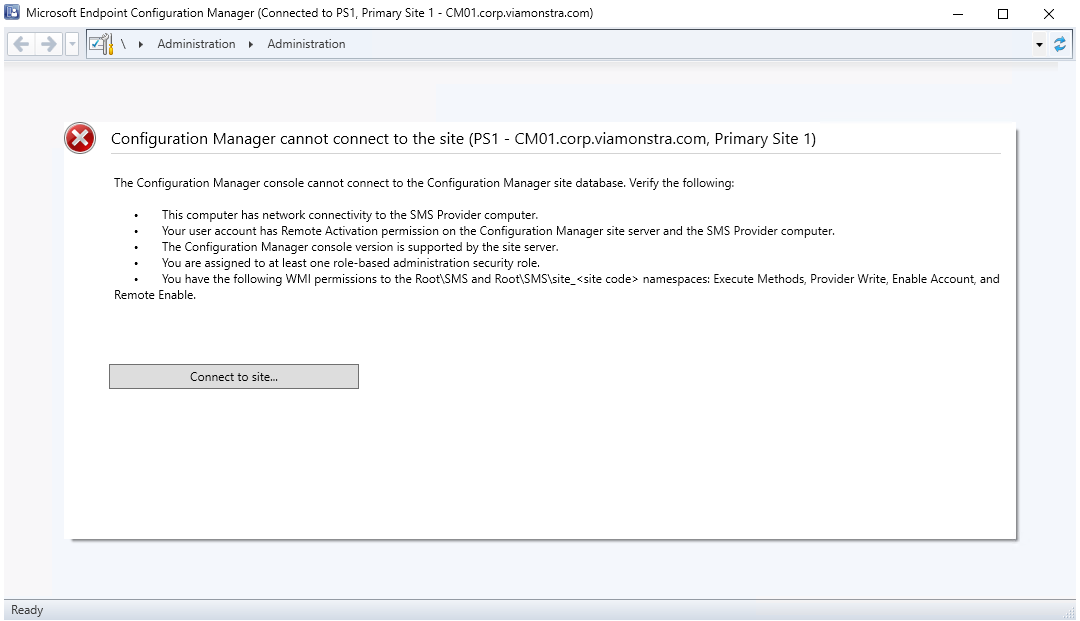
Attempting to launch the CM Console without using the Virtual Smart Card will show that the console is unable to connect.
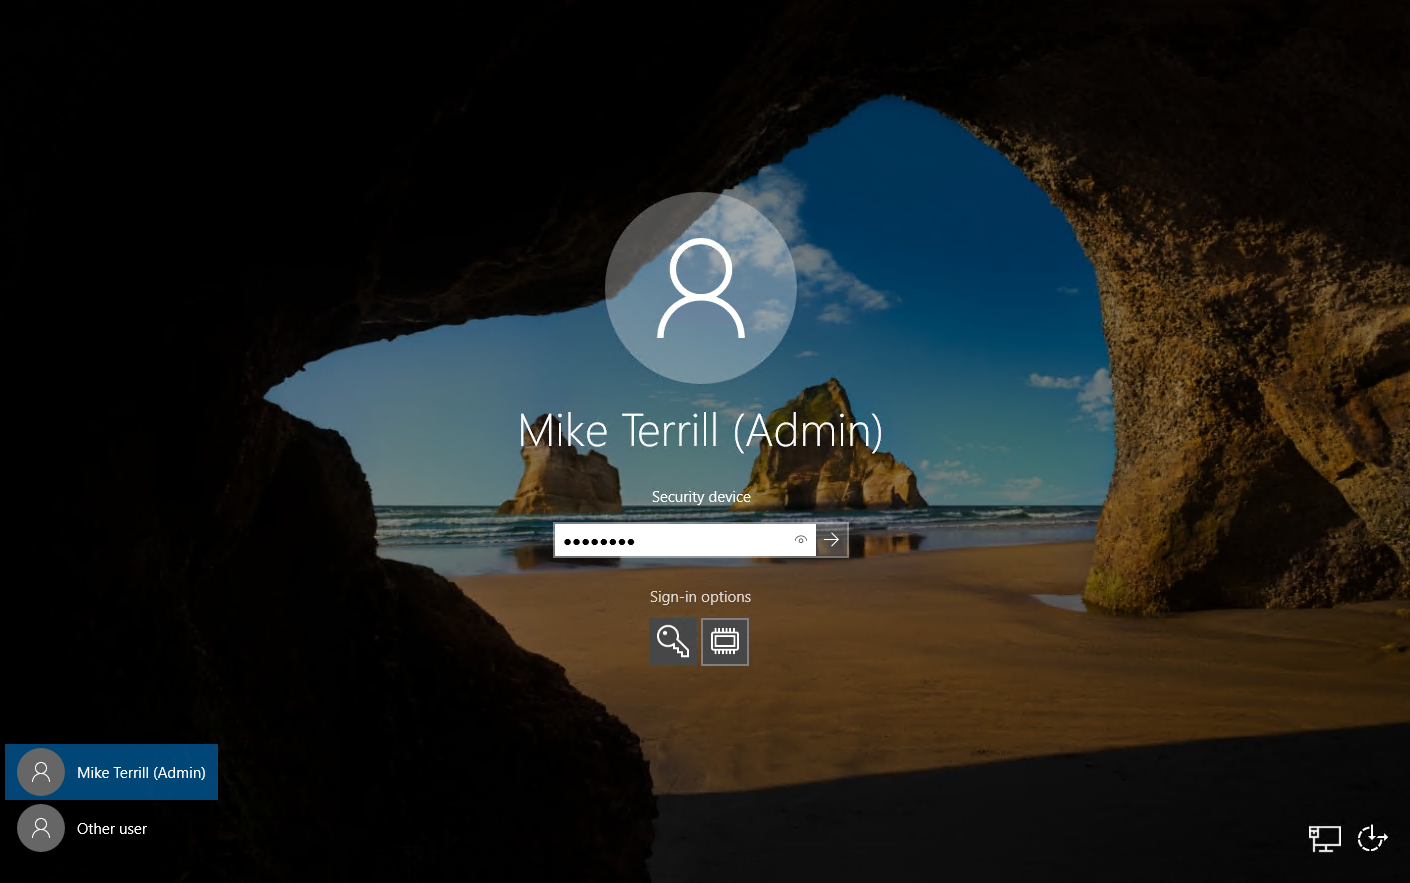
Next, sign into Windows using the Virtual Smart Card. It is the Sign-in option that looks like a security chip.
Launch the CM Console and it will now be able to connect.
Summary
Hopefully this post helps get you on the right track towards further locking down and protecting My Precious MEMCM. I have recently seen blog posts from the InfoSec community on Twitter poking more and more at CM, they know that once they get access to CM it is game over! Therefore, the more deadbolts that can be locked, the better.
Originally posted on https://miketerrill.net/

Thanks Mike, Great and very helpful BLOG!