1 Overview
Microsoft Office 365 introduces a new way to deploy and update Office 365 using Click-to-Run technology. Office 365 is typically installed using the Office 365 portal. However, this presents several challenges in a managed environment. The first challenge is that users must be local administrators on their computers in order to install Office from the Office 365 portal. Hopefully in a well-managed environment, end users do not have local administrator rights, but that is a topic for another time. The second challenge is that the install binaries come from the Office Content Distribution Network (CDN). In other words, the necessary files are streamed down from the Internet to the user’s computer. This also presents a challenge in corporate environments where Internet network connections and Wide Area Network links are already bandwidth constrained. Lastly, Office 365 does not integrate with System Center 2012/R2 Configuration Manager Software Updates (or Windows Update), and instead use the Office CDN for updating and patching Office 365 installations.
Fortunately the Office 365 Team has released the Office Deployment Tool which aides in deploying and updating Office 365 installations from on-premises locations. This document will outline one method on how the Office Deployment Tool can be used to deploy Office 365 with System Center 2012/R2 Configuration and 1E Nomad and leverage the bandwidth efficiencies and peer to peer capabilities from 1E Nomad.
Disclaimer:
Your use of these example scripts is at your sole risk. This information is provided “as-is”, without any warranty, whether express or implied, of accuracy, completeness, fitness for a particular purpose, title or non-infringement. I shall not be liable for any damages you may sustain by using these examples, whether direct, indirect, special, incidental or consequential.
2 Getting Started
The first thing that is required is the Office Deployment Tool. This is available here on the Microsoft Download Center or simply search for “Office Deployment Tool Download” using your favorite search engine (Note: there is a new version of the tool for the Office 2016 release). After downloading the exe, run it, accept the license agreement and click continue.
Create a folder called Office 365 in a preferred location, for this example we will use \Downloads\Office 365.
After running, it should display a “Files extracted successfully.” message. If not, make sure you have proper access to the target directory.
The target directory should contain two files – a sample configuration.xml and setup.exe.
Make a copy of the configuration.xml file and call it download.xml. Edit the file so that it contains the following contents (be careful of word wrap):
<Configuration>
<Add SourcePath="\\CM12PS1.contoso.com\ContentSource\Packages\Microsoft\Office 365 x86" OfficeClientEdition="32" >
<Product ID="O365ProPlusRetail">
<Language ID="en-us" />
</Product>
<Product ID="VisioProRetail">
<Language ID="en-us" />
</Product>
</Add>
</Configuration>
This will download the source files for the 32-bit version of Office Professional Plus and also the 32-bit version of Visio Professional. Adjust the products accordingly, downloading all of the Office Products that are used in your environment. If there are users that do not use some products (like Visio Professional), then multiple deployment configuration files can be created. For more information on the various options, please refer to the Reference for Click-to-Run configuration.xml file.
For the SourcePath, enter the location of your Configuration Manager package repository.
3 Setup the Office 365 Source Files
Open a command prompt and navigate to the directory containing the Office Deployment Tool (for my example this is C:\Users\Administrator.CONTOSO\Downloads\Office 365). Run setup.exe using the following command line:
Setup.exe /download download.xml
This could take a few minutes depending on the speed of your Internet connection. The above configuration downloads about 1.08 GB of source files. The following directory structure will look like the following (the screen shot is from the April 2015 release and the version changes monthly):
Copy setup.exe (from the Downloads\Office 365 directory) to the Office 365 x86 folder.
Create a file called Install.xml in the Office 365 x86 folder with the following contents (be careful of word wrap):
<Configuration>
<Add SourcePath="C:\Preload\Office365" OfficeClientEdition="32" >
<Product ID="O365ProPlusRetail">
<Language ID="en-us" />
</Product>
<Product ID="VisioProRetail">
<Language ID="en-us" />
</Product>
</Add>
<Updates Enabled="TRUE" UpdatePath="C:\Preload\Office365" />
<Display Level="None" AcceptEULA="TRUE" />
<Logging Level="Standard" Path="%temp%" />
<Property Name="AUTOACTIVATE" Value="1" />
</Configuration>
This will point both the SourePath and the UpdatePath to a local path called C:\Preload\Office365 on the user’s computer. It will install Office 365 from this location and it will also update from this location. The UpdatePath could be defined as an internal share, however, you would lose the intelligent bandwidth and peer to peer capabilities that Nomad provides when deploying updates.
The above configuration file will install the following components:
Access 2013
Excel 2013
InfoPath Designer 2013
InfoPath Filler 2013
OneDrive for Business 2013
OneNote2013
Outlook 2013
PowerPoint 2013
Publisher 2013
Send to OneNote 2013
Skype for Business 2015
Visio 2013
Word 2013
Office 2013 Tools
Chances are not all components will be installed in your environment, so for more information on the various options, please refer to the Reference for Click-to-Run configuration.xml file. You can even create multiple configuration files (and corresponding CM Programs as seen below) all within the same package.
Next, create a file called Install.bat (yes I know – a bat file, right? But you would be surprised how many companies have not switched to PowerShell yet) in the Office 365 x86 folder with the following contents (be careful of word wrap):
@ECHO OFF
REM Install.bat
REM Version 1
REM 4/25/2015

IF EXIST C:\Preload GOTO MDO365

MD C:\Preload

:MDO365

IF EXIST C:\Preload\Office365 GOTO CLEANUP

MD C:\Preload\Office365

:CLEANUP

IF EXIST C:\Preload\Office365\Office (

RD /S /Q C:\Preload\Office365\Office

)

DEL /F /Q C:\Preload\Office365\*.*

SET SOURCEDIR=%~dp0

SET O365CACHE=C:\Preload\Office365\

XCOPY *. %O365CACHE% /T /E

SETLOCAL ENABLEDELAYEDEXPANSION

for /R %~dp0 %%G IN (*.*) do (

SET SOURCE=%%G

SET DEST=!SOURCE:%SOURCEDIR%=%O365CACHE%!

fsutil hardlink create !DEST! !SOURCE!

)

ENDLOCAL

REM Delete Install.bat from the Preload\Office365 directory

DEL /F /Q C:\Preload\Office365\Install.bat

IF "%1"=="/pre-cache" GOTO END

%O365CACHE%Setup.exe /configure %O365CACHE%install.xml

:END
Since we are installing and upgrading Office 365 from the local disk, we create a set directory that will be used throughout the process. This is done because the directory in the CCM Cache will be a random character and the configuration file needs a set path. The contents will be hard linked from the CCM Cache to the C:\Preload\Office365 directory in order to minimize required disk space (it is already hard linked from the Nomad cache in to the CCM Cache). Effectively, the contents are only on the disk once with three pointers.
Since the files change between updates, the Office 365 cache location is cleared of any previous files and then new hard links are created with the new files. This keeps the Office 365 cache from growing and taking up unnecessary disk space. Since the script is creating hard links, the process takes a split second.
The contents of the Office 365 x86 directory should now look like the following:
4 Create the Office 365 Package in CM
In the Configuration Manager Console, create a new Package in the Software Library.
Populate the following package information using the same source folder as above:
Choose Standard program as the program type:
Populated the following information about the standard program:
Enter the corresponding requirements:
On the Nomad Settings page, enable Nomad and set the desired Cache Priority:
Confirm the information on the summary screen:
Confirm the successful creation and click Close:
Back in the console under Packages, right-click on the Office 365 package and select Create Program:
Select Standard program:
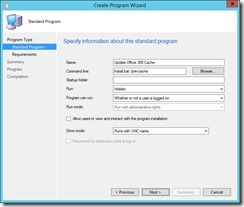
For the program name use Update Office 365 Cache with the command line: Install.bat /pre-cache:
Use 1 GB for the estimated disk space and the same platform requirements as before:
Confirm the information on the summary screen:
Confirm the successful creation and click Close:
5 Distribute the Package to the DP(s)
Back in the console under Packages, right-click on the Office 365 package, select Distribute Content:
Review the selected content and click Next:
Select the correct Distribution Points or Distribution Point Group:
On the summary page confirm the settings and click Next:
On the completion page, confirm success and click Close:
6 Create the Office 365 Collection
Create the collection that will be used to deploy Office 365 and also update the local Office 365 cache. Depending on your preference and deployment strategy, two collections can be created instead of one. One can be for the initial deployment and the other can be for updating the Office 365 cache on a monthly, quarterly or as needed basis. For this purposes of this document, we will keep it simple and only create one collection.
In the CM console under Device Collections, right-click and select Create Device Collection:
Give the collection the name Office 365 and select a corresponding limiting collection:
Add a couple of test systems to the Office 365 collection that is being created:
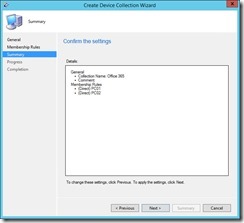
Confirm the settings on the summary page:
On the completion page, confirm the successful completion and click Close:
7 Create the Office 365 Installation Deployment
Now create the Deployment that will install Office 365 on systems that are in the collection that was just created in the previous step. In the console under Packages, right-click and select Deploy.
Select Install Office 365 for the software and Office 365 for the collection:
Verify that the content is on the required Distribution Points/Groups:
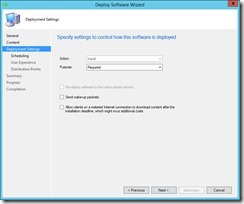
On the Deployment Settings page, leave the Purpose set to Required for an unattended installation:
Set the schedule and rerun behavior:
Click Next on the User Experience:
On the Distribution Points page, since we are using Nomad we can safely select Download content from distribution point and run locally for slow and unreliable network boundaries (which also includes undefined network boundaries). That is another benefit of Nomad is the fact that you do not need to ever worry about managing boundaries in order for it to work (unlike other solutions). In addition, enabled Allow clients to use a fallback source location for content (since with Nomad, you probably only have a couple of Distribution Points in the datacenter).
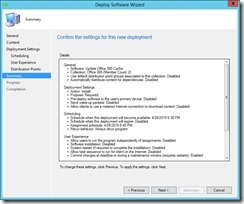
On the Summary page, verify the settings and click Next:
Verify that the Deploy Software Wizard completed successfully:
8 Verify Installation
Logging onto PC01, we see using the Nomad Branch GUI that it is the master and is downloading the package from the CM Distribution Point:
Whereas on PC02, it is pulling the Office 365 package from PC01 (notice the mode – SMB from Peer):
Back in the CM console, we see that both installed successfully:
Using fsutil, you can see that the files are only on the disk once and have multiple pointers (i.e. hard links). One points to the Nomad cache, one to the CM Cache and the last one to the Preload\Office365 directory:
9 Create the Update Office 365 Cache Deployment
Now it is time to create the Update Office 365 Cache Deployment. Office 365 is updated on the second Tuesday of the month with updates and/or security patches. The process is combined, so there is currently no way to split out just the security updates. The version is displayed on the Account page of anyone of the Office applications. This is from the April 2015 release (version 15.0.4711.1002, which is the same as a subdirectory in our Office 365 package as seen above):
The following knowledge base article lists all of the Office 365 updates: https://support.microsoft.com/en-us/gp/office-2013-365-update
The Office 365 package can be updated monthly, every other month, or quarterly depending on your company’s patching frequency. Keep in mind that each of the files change in the monthly download, so the majority of the files will need to be cached. Also, it is probably best to test them out on a pilot group prior to releasing them to the entire enterprise. This discussion goes beyond the subject of this article, but there is a version property that can be used in the configuration file.
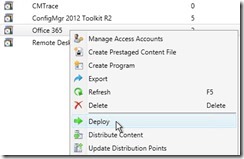
In the CM Console under Packages, right-click on the Office 365 package and select Deploy:
Select Update Office 365 Cache for the software and Office 365 for the collection:
Verify that the content is on the required Distribution Points/Groups:
On the Deployment Settings page, leave the Purpose set to Required for an unattended installation:
Set the schedule and rerun behavior. Since this is just updating the Office 365 Cache, this example configures it to run on the third Tuesday of every month and the rerun behavior is set to Always rerun program:
Click Next on the User Experience:
Just like the Install Office 365 Deployment, on the Distribution Points page, since we are using Nomad we can safely select Download content from distribution point and run locally for slow and unreliable network boundaries (which also includes undefined network boundaries). That is another benefit of Nomad is the fact that you do not need to ever worry about managing boundaries in order for it to work (unlike other solutions). In addition, enabled Allow clients to use a fallback source location for content (since with Nomad, you probably only have a couple of Distribution Points in the datacenter).
On the Summary page, verify the settings and click Next:
Verify that the Deploy Software Wizard completed successfully:
Now on the third Tuesday of every month, the clients will update their Office 365 cache with the latest binaries. Office 365 updates are done from a scheduled task on the local system and will be updated accordingly after the next cycle.
10 Summary
The above process outlines one method for deploying and updating Office 365 in a managed environment by leveraging the current investment in System Center 2012/R2 Configuration Manager and 1E Nomad. This process will overcome the challenges that were mentioned in the beginning of this article. It will allow companies to deploy and update Office 365 without causing negative impact to the corporate WAN links and Internet connections. It can be used without Nomad, but then you lose the P2P functionality and intelligent bandwidth management when downloading from a DP. So a word to the wise if you don’t use Nomad – be careful!!!! Or better yet – head over to www.1e.com!
11 Reference Links
Office Deployment Tool for Click-to-Run
Deploy Click-to-Run for Office 365 products by using the Office Deployment Tool
Overview of the update process for Office 365 ProPlus
Managing Updates for Office 365 ProPlus – Part 1
Managing Updates for Office 365 ProPlus – Part 2
System Center 2012 R2 Configuration Manager
Originally posted on https://miketerrill.net/










Nice walk through Mike.
Thanks Mike!