March 7, 2026
If you are using UniFi networking equipment at home and want to configure the DHCP scope options so that you can PXE boot using 2Pint Software iPXE Anywhere, then follow along to see how easy it is to set up.
NOTE: UniFi does change the UI from time to time so your UI might look a little different.
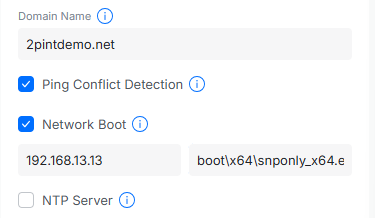
Under Networks, click on existing network. Make sure the Auto-Scale Network is unchecked, as this will allow the additional configuration options.
Enable Network Boot. For the Server IP, enter the IP address of your iPXE server. For the Filename, enter: boot\x64\snponly_x64.efi
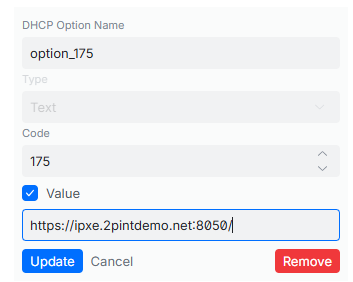
If you are also using the iPXE Anywhere WebService (which you should), then you will need to add a custom DHCP option for Option 175 as type Text and give it a meaningful name (I called mine option_175). For the value, enter the following, replacing the FQDN for your own server and be sure to include the trailing forward slash: https://ipxe.2pintdemo.net:8050/
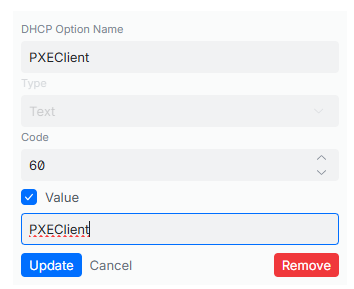
Create another custom DHCP option for Option 60 as type Text and give it a meaningful name (I called mine PXEClient). For the value, enter PXEClient.
Repeat this for other subnets that you want to PXE boot from. For more information on configuring DHCP scope options for iPXE Anywhere, please see the 2Pint Software documentation: Overview – DHCP Scope Options | 2PXE Server | Product Documentation
Originally posted on https://miketerrill.net
