![]()
HP has a utility that is similar to the Dell’s Command | Configure utility (see How to create a Dell Command-Configure Package in ConfigMgr) called the HP BIOS Configuration Utility that allows for reading and setting BIOS/UEFI values on HP systems. The latest release (version 4.0.13.1 at the time of this blog post) can be found on the HP Client Management Solutions page in the Download Library. The HP BIOS Configuration Utility can be used to enable and standardize BIOS/UEFI settings automatically across the enterprise, yielding a consistent, standard environment. Now that Windows 10 is here, organizations are going to want to configure UEFI as the default so that they can leverage features like Secure Boot, Device Guard and Credential Guard.
The HP BIOS Configuration Utility is only command line (in other words, there is not a GUI component like Dell’s Command | Configure utility). However, the HP BIOS Configuration Utility can output an answer file that can then be used to apply to other systems. For this post, I am going to show you how to create a basic ConfigMgr Package that can be used as part of an OSD Task Sequence
The first thing you need to do is download it from the HP Client Management Solutions page (or search on HP BIOS Configuration Utility) and install it on a HP system.
Next, create a directory on your ConfigMgr Package repository share where you store the source files for your ConfigMgr Packages (for example \\ContentSource\Packages\HP\BIOS Configuration Utility-WinPE\4.0.13.1).
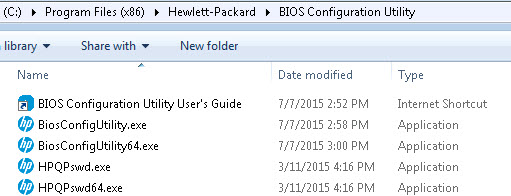
Locate the install directory and copy the contents of the installation directory (minus the link to the User’s Guide) to the Package share. On a x64 system, the default install location is C:\Program Files (x86)\Hewlett-Packard\BIOS Configuration Utility.
Create a file in the root of the Package directory called BCU.cmd. Use the following for the contents of the file:
@ECHO OFF

set cmdline=%*

ECHO == Seting BIOS Settings ==

REM Determine Arch
IF "%PROCESSOR_ARCHITECTURE%" == "AMD64" GOTO :X64
GOTO X86

:X64
SET BCU="BiosConfigUtility64.exe"
GOTO RunBCU

:X86
SET BCU="BiosConfigUtility.exe"
GOTO RunBCU

:RunBCU
ECHO --Running command %BCU% %CMDLINE%
%BCU% %CMDLINE%

EXIT /B %errorlevel%
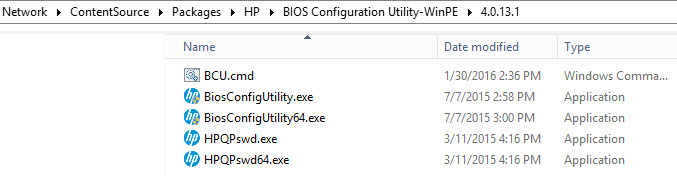
This file handles the logic to run the correct exe based on the currently detected platform. The final Package source directory should look like the following:
Create a Package in ConfigMgr like you normally would and distribute it to the Distribution Points. A Program is not required, so that can be skipped.
In a future post, I will show how this can be used in an OSD Task Sequence.
Originally posted on http://miketerrill.net

Hey Mike, great post.
Would it be possible to pass variable argurments to the script like the config file and password file required by BCU during OSD?
Hi Martin – glad you like the post! Your suggestion sounds like a great future blog post 😉
Hi Mike
Thanks – If you want I can share the OSD part with you?
Andrew
HP’s can contain many different configurations since at one point in time they had 3 different BIOS teams. In my prior job, we analyzed probably 30 – 40 different HP models and built the logic into the BIOS settings tool I architected and designed. However, I am no longer in that business so if you want to share what you have and the models you have tested it on, that could help someone else out. Thanks, Mike
Did you ever write the Task Sequence usage post you mentioned ? I am struggling with getting the BIOS Config util to enable TPM during OSD TS.
Not yet, but I have a TPM project coming up after our 1709 upgrade is complete.
Thanks, I figured it out !
Can you share how you got the task sequence to work?
I’ve gotten this to work for the most part. Only issue I get while running this in WinPE during the Task Sequence is related to ‘MS Digital Marker.’ Searching points to it being related to TPM which we do not use. Have you seen this before? Right now I have just chosen ‘continue on error’ to proceed with testing.
I have not seen this before – can you share more information or possibly a screen shot?
Running the TS action in WinPE. Here is the error snippet:
InstallSoftware 12/3/2018 9:44:18 AM 1444 (0x05A4)
InstallSoftware 12/3/2018 9:44:21 AM 1444 (0x05A4)
Process completed with exit code 13 InstallSoftware 12/3/2018 9:44:24 AM 1444 (0x05A4)
InstallSoftware 12/3/2018 9:44:24 AM 1444 (0x05A4)
InstallSoftware 12/3/2018 9:44:24 AM 1444 (0x05A4)
InstallSoftware 12/3/2018 9:44:24 AM 1444 (0x05A4)
InstallSoftware 12/3/2018 9:44:24 AM 1444 (0x05A4)
InstallSoftware 12/3/2018 9:44:24 AM 1444 (0x05A4)
InstallSoftware 12/3/2018 9:44:24 AM 1444 (0x05A4)
InstallSoftware 12/3/2018 9:44:24 AM 1444 (0x05A4)
Command line “D:\_SMSTaskSequence\Packages\KSD00505\BiosConfigUtility64.exe” /Set:”650G1Config.bin” /cspwdfile:”650G1.bin” returned 13 InstallSoftware 12/3/2018 9:44:24 AM 1444 (0x05A4)
ReleaseSource() for D:\_SMSTaskSequence\Packages\KSD00505. InstallSoftware 12/3/2018 9:44:24 AM 1444 (0x05A4)
reference count 1 for the source D:\_SMSTaskSequence\Packages\KSD00505 before releasing InstallSoftware 12/3/2018 9:44:24 AM 1444 (0x05A4)
Released the resolved source D:\_SMSTaskSequence\Packages\KSD00505 InstallSoftware 12/3/2018 9:44:24 AM 1444 (0x05A4)
Process completed with exit code 13 TSManager 12/3/2018 9:44:24 AM 612 (0x0264)
!——————————————————————————————–! TSManager 12/3/2018 9:44:24 AM 612 (0x0264)
Failed to run the action: HP 650 G1.
The data is invalid. (Error: 0000000D; Source: Windows) TSManager 12/3/2018 9:44:24 AM 612 (0x0264)
Are you running this as a Run Command Line step?
Just in case others come across something similar and stumble across these comments – the above was solved by reducing the number of settings in the HP BCU answer file to only those settings that were relevant to all systems of the same model. The setting in the answer file that was causing an issue was the MS Digital Marker. This setting is part of the Windows licensing activation on newer systems and is likely unique based on the licensing key and hardware properties. So long story short, make sure this isn’t in the answer file.